


Nero Platinum
Summer Special
Get more out of your photos, videos, and memories this summer.
With Nero Platinum Suite 2026, you can edit, organize, back up, and convert your media more easily and quickly than ever—now featuring smart AI features and an exclusive summer discount.


Nero Platinum Suite 2026
The new version of our all-in-one multimedia suite sets new standards:
more power, more functions, more convenience!
🎬 To the info video »

Even more space on your PC
Now also find and delete duplicate music and video files in Nero DuplicateManager.

Relaxed video editing
Switch between light and dark user interface in Nero Video.

Your pictures - now even better
Nero AI Image Upscaler with new interface and even more local AI models.
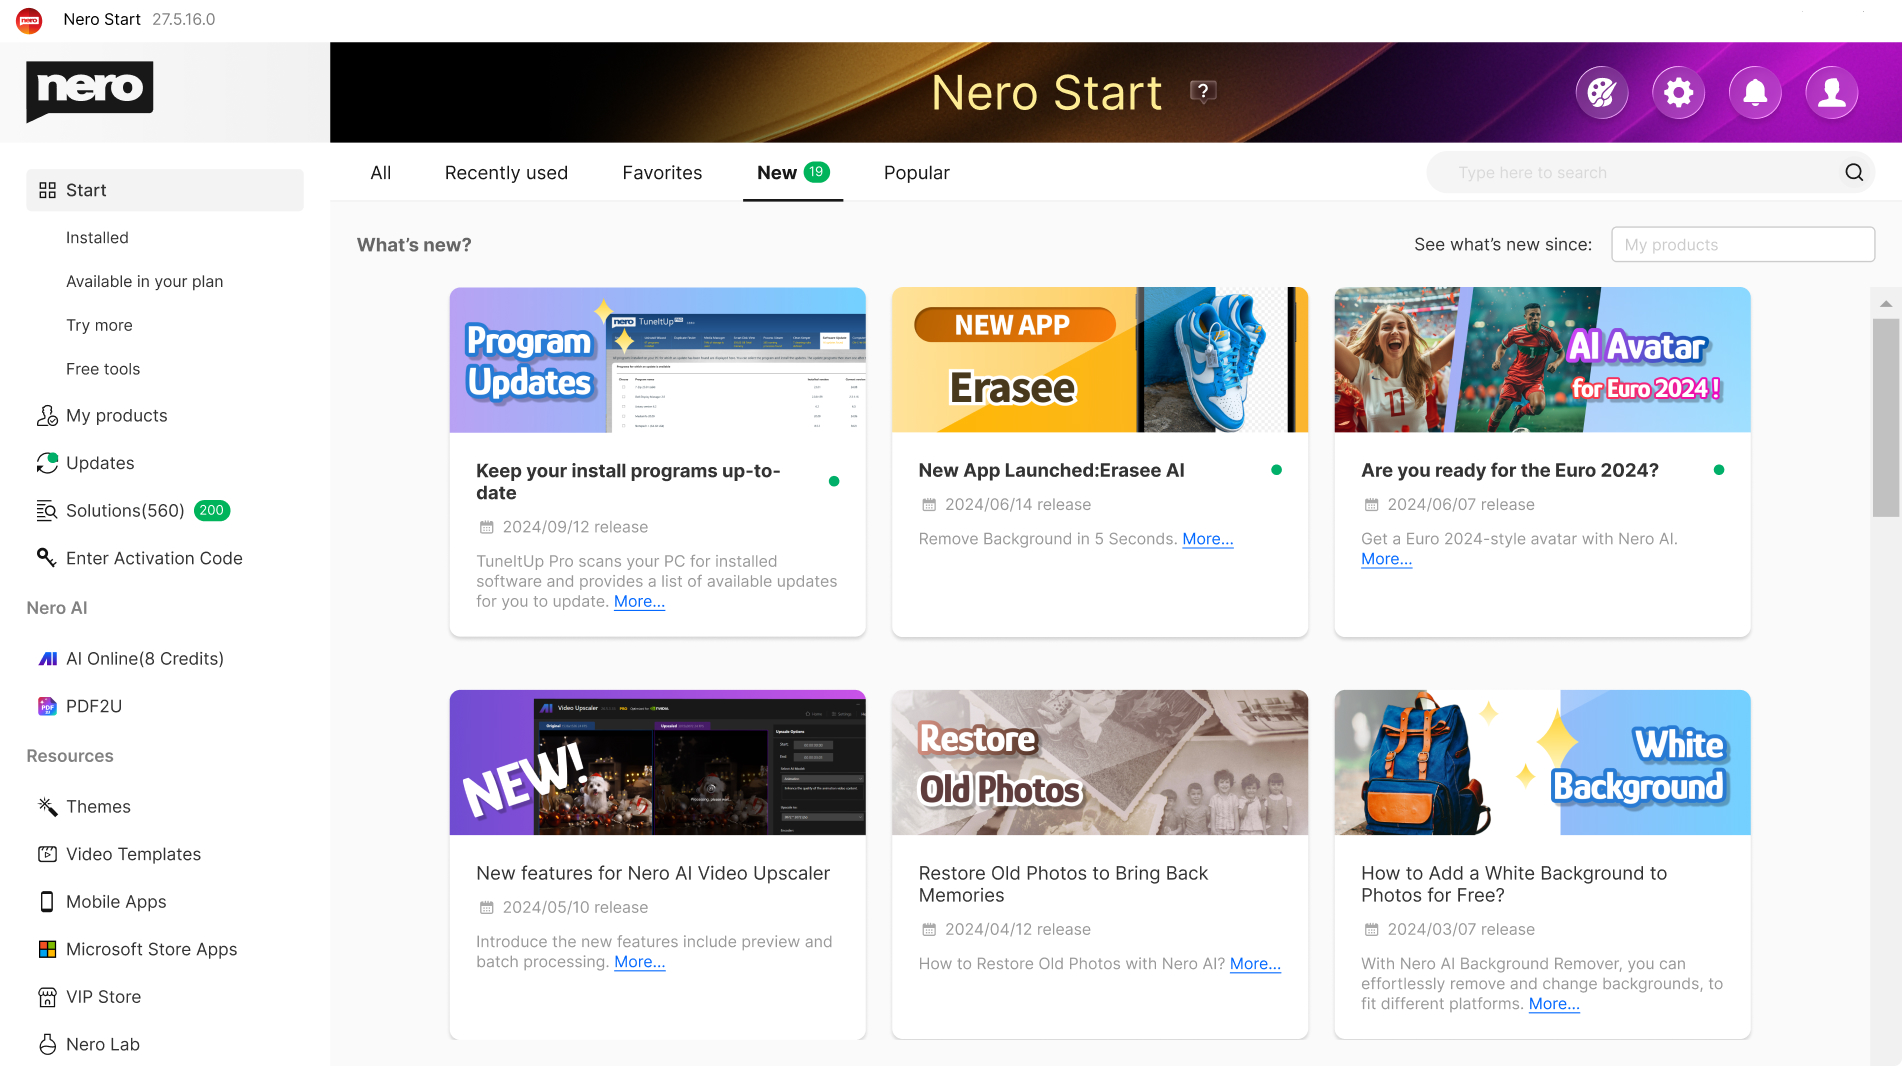
One click, everything is there - the central starting point
Nero Start: Your control centre for all Nero downloads and activations
👉 Nero Start (virtual preview). Click here »
Which version is right for you?
🙌 All differences at a glance—clear, transparent, and fair.
| Feature | Nero Platinum Subscription | Nero Platinum Unlimited |
|---|---|---|
| Payment model | Affordable annual payment | One-time payment |
| Duration | As long as the subscription is active | Unlimited |
| Always the latest version | ✅ Yes, automatically | ❌ No, only the purchased version |
| Feature updates | ✅ Inclusive | ❌ Not included |
| Planning reliability | ✅ Yes, constant price | ✅ One-time payment |
| Price stability | ✅ Subscription price is guaranteed not to increase | ✅ One-time payment |
| Nero TuneItUp,
Nero AI Image Upscaler | PRO version included | Only the basic version is included |
| 100 Nero AI credits free of charge | ✅ New with every renewal | One-time |
| Ideal for | Users who always want the latest version | Users who want to make a one-time purchase |
| $44.95 $59.95 Save now » | $119.00 $159.95 Buy now » |
Why the Nero Platinum Subscription is worth it
With the Nero Platinum Subscription, you benefit from maximum flexibility and future-proofing. You automatically get access to the latest version, including new features, programs, and modern AI support—at no additional cost or upgrade fees.
👍 Particularly important: Once you have taken out a subscription, Nero has never increased the price over time, and no existing features have ever been restricted. This means you retain the full range of services at fair and reliable conditions for the long term.
The subscription is therefore the ideal choice for anyone who wants to stay up to date without having to worry about updates, additional costs, or loss of functionality.
🔔 NEWS: Windows discontinues CD information
At the end of 2025, Windows will stop automatically recognizing CD metadata. If you would like to continue using this service, we recommend using Nero MediaHome or Platinum. Our service will remain reliably active—guaranteed.

The right solution for every project


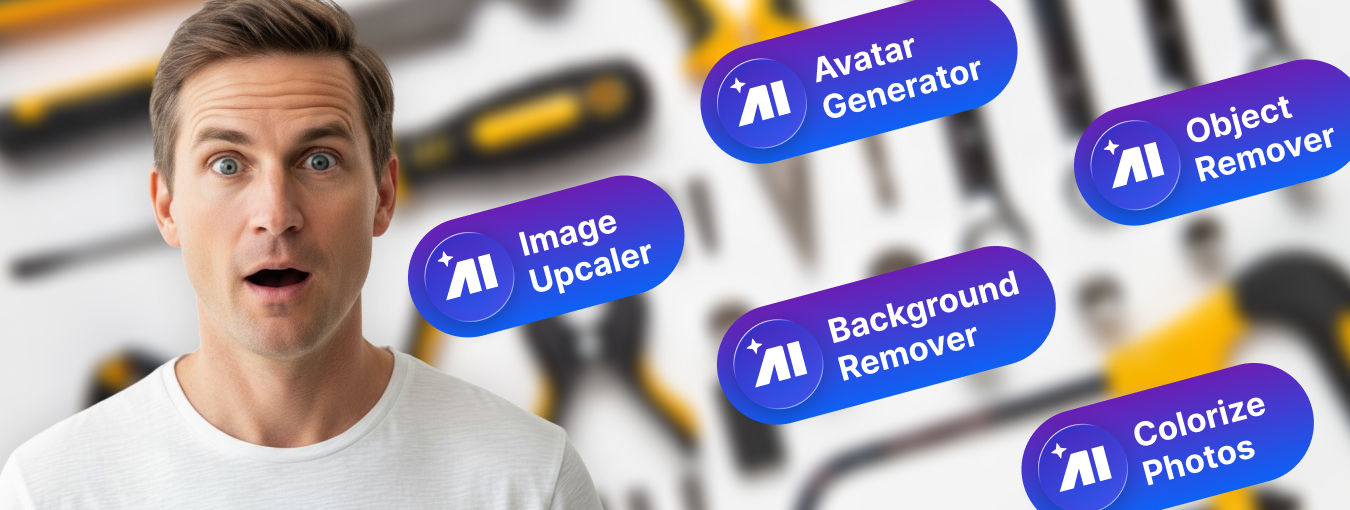
Never again chaos in your beloved photo album thanks to new Nero AI: Now you can organize photos, tag, rate, and search images even easier. AI-based scene recognition keeps you on top of things, you can assign names to faces, and duplicate or similar images are detected faster and are easy to delete. Sort your photos by location and view your adventures on the world map, or view all your photos in an easy-to-read timeline. 1-click photo editing is included, of course. And it works locally on your PC, no cloud required!

Create a small movie masterpiece from your moving memories in no time at all: Hundreds of high-quality theme templates for holidays, occasions and events support you in doing so. Great effects add professional polish: create videos with picture-in-picture, alpha channel, tilt-shift, slow motion and time-lapse effects. Edit, trim and export your videos. Get sharper than reality with the 8K playback feature. Impress your friends and stream your masterpiece on the big TV. As a gift, you can burn your movie to an optical disc.

Music invigorates the mind! Now enjoy and discover your stars in a whole new way: Save your favorite songs from all music streaming services easily, quickly, legally and in the best quality. Edit and trim your music files to your liking (effects, fade-in/out, volume, etc.). Import your CD collection and easily edit metadata like artist, genre and album art.

Your data is important to us! Convenient and secure backup solutions for you: Back up your valuable data quickly and easily to external hard drives, optical media and now even to your cloud (Google Drive, OneDrive, MagentaCLOUD, HiDrive, pCloud and QLOUD). Create automated backups, incremental snapshots and version management. Protect your data with 256-bit encryption for CDs, DVDs and USB sticks.
Nero Platinum offers many other tools that perfectly complement your Windows PC: e.g. by recovering deleted data, easily encrypting your personal data, or reliably formatting and duplicating media. With Nero Platinum you get a toolbox that equips you for all eventualities.
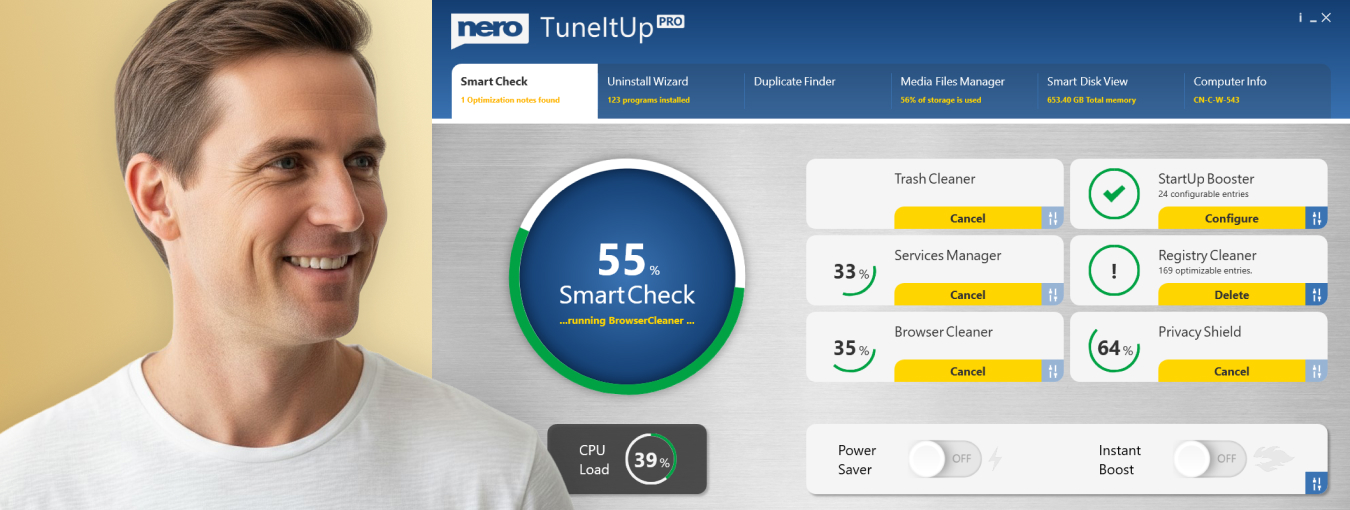
Nothing is more annoying than a slow PC. We'll give you more performance: From now on, optimize and speed up like a pro: Nero will make your PC faster, update your drivers, and improve your Internet speed. We give you total control over your PC performance. You decide whether you want to solve PC problems one by one or all at once.
What's in the Nero Platinum Suite?

- Nero Video: Create, edit and export videos and slideshows.
- Nero AI Image Upscaler: Enlarges and sharpens your photos locally on your PC using artificial intelligence. This lets you play it safe, as you don't have to upload your private images to a cloud.
- Nero AI Photo Tagger: Order and structure in your photo archive thanks to artificial intelligence.
- Nero Burning ROM: Rip, copy, burn and protect data.
- Nero TuneItUp PRO: Makes your PC faster and improves your internet speed. (Only included in the version 1 PC / 1 year.)
- Nero DuplicateManager: Cleans your image archive of exact, duplicate and similar images quickly and accurately.
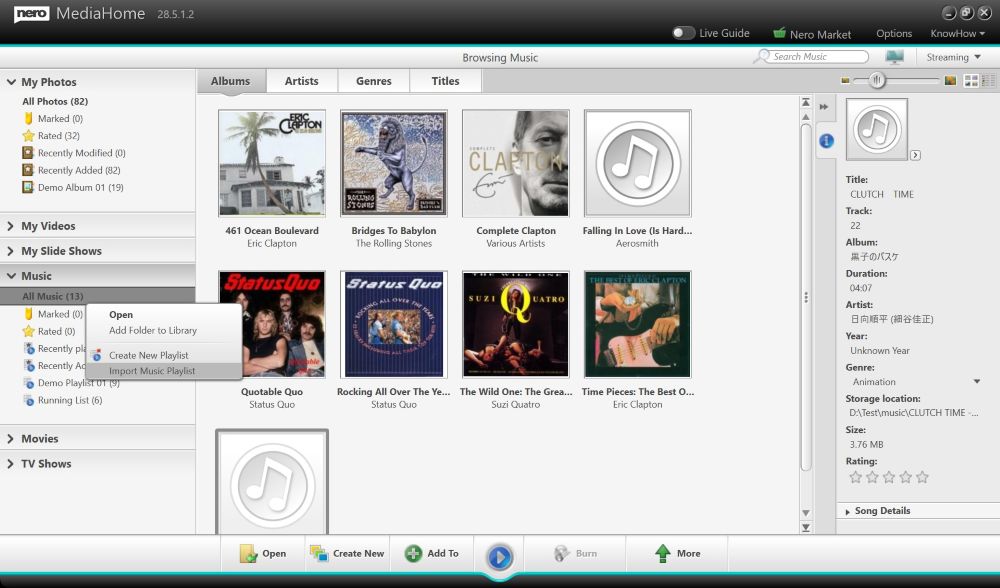
- Nero MediaHome: The hub for archiving, sorting, creating and playing your files.
- Nero Recode: Convert and rip videos and music to all standard formats for your mobile devices.
- Nero BackItUp: Backs up your data quickly and easily to an external hard drive, optical media, or the cloud.
- Nero USBxCopy: This tool helps you to copy your data to multiple USB devices at the same time
- Nero Screen Recorder: Create screen recordings according to your ideas with one click. (Only the basic version is included)
- Nero Score: Take a speed test and push your PC to its limits
- Nero Motion Tracker: Automatically detect and pixelate moving objects
- Nero PhotoSnap: Let your photos shine in new splendor
- Nero Soundtrax: Digitize sound carriers and implement audio projects
- Nero WaveEditor: Record sound from PC and record audio files
- Nero Express: Burn data and media easily
- Nero CoverDesigner: Customize your discs
- Nero Face Beautifier Remove wrinkles and improve your skin tone so that you shine in the best light
- Nero Rescue Agent: Recover files from damaged discs and drives
- Nero Disc to Device: Transfer media from discs to devices
Nero Platinum – amazingly good.

NEW: Nero Platinum Suite 2026
More power, more functions, more convenience!
- Everything in one suite: photo, video and music editing plus backup and management
- More power than ever: over 500 solutions with state-of-the-art AI support
- Simple and reliable: The most powerful multimedia collection of all time
Play it safe
Nero in numbers

Satisfaction

Installations

Languages

